How To Search For A Certain File Type On Mac
суббота 09 февраля admin 31
Mac OS X makes it easy to change file associations, which determine what programs are used to open various file types. Team fortress 1 free. You can change the setting for individual files or for all files of a specific file type.
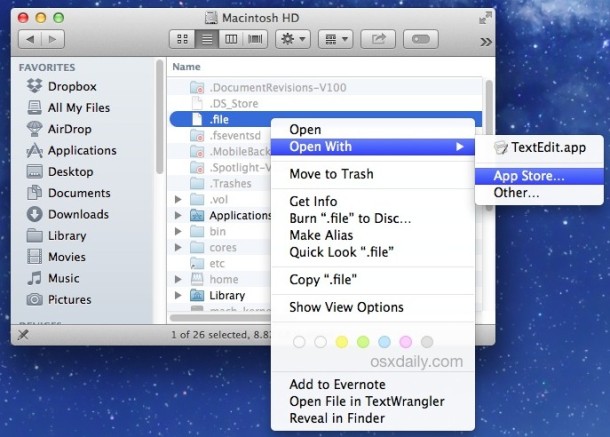
:: Answers Q: How can I change what program opens a certain file on a Mac? A: () Mac OS X makes it easy to change, which determine what programs are used to open various file types. You can change the setting for individual files or for all files of a specific file type. Individual Files To change what program opens a specific file, you first need to open the file's information window. This can be done by selecting the file and clicking ' Get Info' from the File menu. Or you can simply (Control-click for single button mouse users) on the file and select ' Get Info' from the contextual menu that pops up.
The information window should look something like image below: Notice the section in the middle of the window that says 'Open with.' When you click the drop-down menu, it will show you a list of that can open the selected file type. If the file is a Microsoft Word document, the list of programs may look something like this: Select the program that you would like to open the file and close the information window. When you double-click the document, it will open using the program you selected. All Files You can also change what program opens all documents of a certain file type. For example, you may want all Microsoft Word documents to open in AppleWorks.
To do this, first select AppleWorks 6 in the drop-down menu, as in the example above. Then, before closing the window, click the Change All. You will be prompted to confirm the change with an alert window: Click Continue and all files with a extension will now open in AppleWorks. Of course, you can change the file associations back to Microsoft Word by selecting Word from the drop-down menu and repeating the same steps.
You need a certain file system (FS) to access any storage device. FAT is the common choice on flash drives and memory sticks. However, FAT is a very old file system and it has very limited features. Particularly on external hard drives, you are better with some other type of file system. There are numerous number of file systems available. Linux and MAC have their own too. To my opinion, NTFS is a good choice for external hard drives.
They allow for large file size, you can assign permissions to the files, and the last but not least, NTFS is readable by Windows, Linux, and Mac machines. However, on MAC, NTFS drives are mounted as read only drives by default, i.e.

You can not modify anything on them, just read. The good news is that the solution is easy. First of all, you need MacFuse prior to be able to access NTFS file systems. How to check if you have MacFUSE? Simply go to your “System Preferences” and look for MacFuse in “Other” section. If you can find it there, you already have MacFuse installed. If you do not have MacFuse, just go to Google, search it, download it, and run the installer.
This will give you access to NTFS drives; however, the access is still readonly. To mount NTFS drives manually with write permission, you can use “mount_ntfs” command prompt and pass the “-o rw”.
This will give you the write permission on the NTFS drives. If you want to have NTFS drives mounted automatically with write permission you need to do couple of more steps. First open a terminal and change the current working path to /sbin by typing “cd /sbin”.
This is the location where mount_ntfs is stored. Now you need to rename this file by typing: sudo mv mount_ntfs mount_ntfs.orig Instead of “mount_ntfs.orig” you can choose any other name that you like. Now, create a script named “mount_ntfs” in /sbin.
Remember that the name for this script is not arbitrary. There are different ways of creating this script. As an example just type: sudo vi mount_ntfs This will give you an empty text files which you need to type the following lines: #!/bin/sh /sbin/mount_ntfs.orig -o rw “$@” Now you need to set the permissions on this script. In the terminal type: sudo chown root:wheel mount_ntfs sudo chmod 755 mount_ntfs You are done. Now you can enjoy NTFS on MAC with full write and read permission. If you didn’t liked it, you can just copy back mount_ntfs.orig over mount_ntfs and everything would be as it was originally.
Remember that, in above procedure, it was assumed that you were in /sbin and you chose mount_ntfs.orig while moving the original mount_ntfs. All those files are there, and need to be there. Otherwise, it won’t work.